SapphireOne Accounts Receivables Report Tutorial: The Statements Report
Creating an Accounts Receivables Statements Report in SapphireOne.
For the next post in our Accounts Receivables Report Tutorials, we will be focusing on the fourth Accounts Receivables reporting option in SapphireOne, the Statements Report.
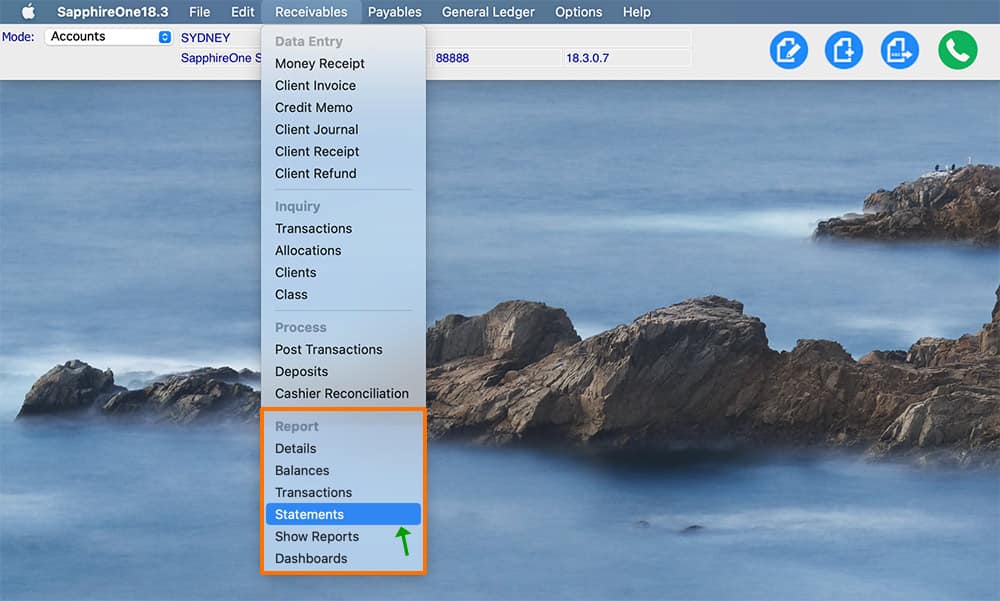
There are six different types of Accounts Receivables reporting options available within SapphireOne. This includes:
Details
Balances
Transactions
Statements
Show Reports
Dashboards
In our previous three posts we looked at the Client Details Report, the Balances Report and the Transactions Report. Read on to learn more about when and how to create the Statements Report, and make sure you are getting the most out of all SapphireOne reporting functionalities.
The Statements Report.
The Accounts Receivables Statements Report gives you the ability to produce different Statement layouts. This report is helpful for debt collection as it gives you the ability to produce a report to give to Clients to show they currently have outstanding.
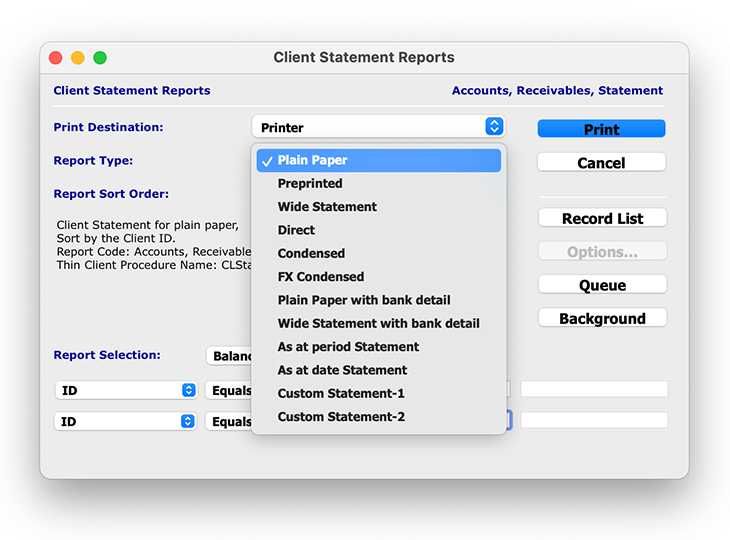
The Statement Report presents a print dialog pop-up for the selection of the items required to be printed in the report.
When ‘Printer’ is selected from the Print Destination drop-down menu, the ‘Report Type‘ menu gives you the ability to report on 12 different Statement Report types. This includes:
Plain Paper – This report will print a statement onto blank paper whether using Laser or Image-Writer printers. All lines, graphics etc will be printed.
Pre-Printed – This is for printing statements onto pre-designed forms. The lines and graphics will already be on the forms.
Wide Statement – This report will print a landscape statement onto blank paper (Laser or Image-Writer).
Direct – This is for printing to serial printers. The layout is set up from the Direct Print control in ‘Utilities’. Navigate to: Utilities/Controls/Direct Print Layouts
Condensed – This report produces a compressed report for filing purposes with the same data as a statement.
FX Condensed – This report produces a client statement report in foreign currency, and is compressed for filing purposes.
Plain Paper with Bank Detail – This produces a statement report on plain paper with the clients bank details in portrait.
Wide Statement with Bank Detail – This is a two section landscape report with a detailed statement on the left and a remittance on the right. The second section is a simple statement/remittance, and provides an area where the amount being paid may be entered and the entire page returned.
As at Period Statement – This function enables the user to print statements based on an ending period. A pop up will ask for the entry of a period.
As at Date Statement – This function enables the user to print statements based on a date as entered. A pop up will ask for the entry of a date.
Custom Statement-1 – This is a Custom Report statement that has been set up in ‘Utilities’. Navigate to: Utilities/Controls/Custom Report Layouts.
Custom Statement-2 – This is a Custom Report statement that has been set up in ‘Utilities’.Navigate to: Utilities/Controls/Custom Report Layouts.
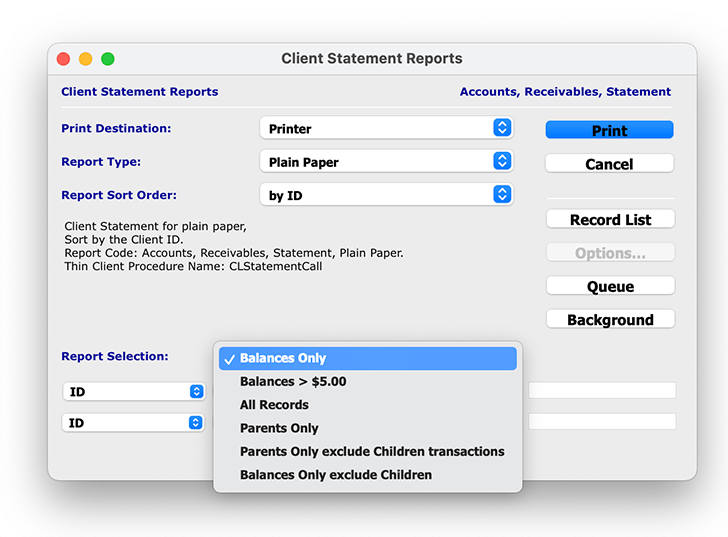
The ‘Report Selection’ drop-down menu gives you the ability to select which clients statement data you would like to report on, allowing you to get more granular and specific with your reporting capabilities.
Balances Only – This is the default selection and the system will only print out Client balances for those who do not have a balance of $0.00.
Balances > $5.00 – This report is the same as the default report, however it will only include Clients who have a balance owing of $5.00 or more.
All Records – This option prints a report for all Clients irrespective of balances owing. In some instances this will be a very large report as Clients with a balance of $0.00 will be included.
Parents Only – This option will only print those Clients who are recognised by the system as parents and have a balance owing.
Parents Only exclude Children Transactions – This option will only print those Clients who are recognised by the system as parents and have a balance owing. Any child transactions will be excluded.
Balances Only exclude Children – This option will print balances for all Clients, except those who the system recognises as Children of Parents.
Once you have chosen your defined report details, and selected ‘Print’, you have the option to open the report as a PDF or print the report directly from SapphireOne.
Any questions?
For the next final post in our next Accounts Receivables Reporting Tutorials we will be focusing on the remaining two ‘Show Reports’ and ‘Dashboards’ reporting functionalities within SapphireOne.
For more information on Accounts Receivables Reports, or to find out how you can get the most out of your SapphireOne application, please contact us or book a call with a member of our Support Team. We are always here to help!