January 14, 2021 * John Adams at 9:00 am
SapphireOne Accounts Receivables Report Tutorial: Show Reports

How to use the SapphireOne Accounts Receivables ‘Show Reports’ function.
In the next post in our SapphireOne Accounts Receivables Report Tutorials, we will be focusing on the fifth Accounts Receivables reporting function available in SapphireOne – the ‘Show Reports’ feature.
As we have seen in our previous posts, there are six different types of Accounts Receivables reports available within SapphireOne. These include:
- Details
- Balances
- Transactions
- Statements
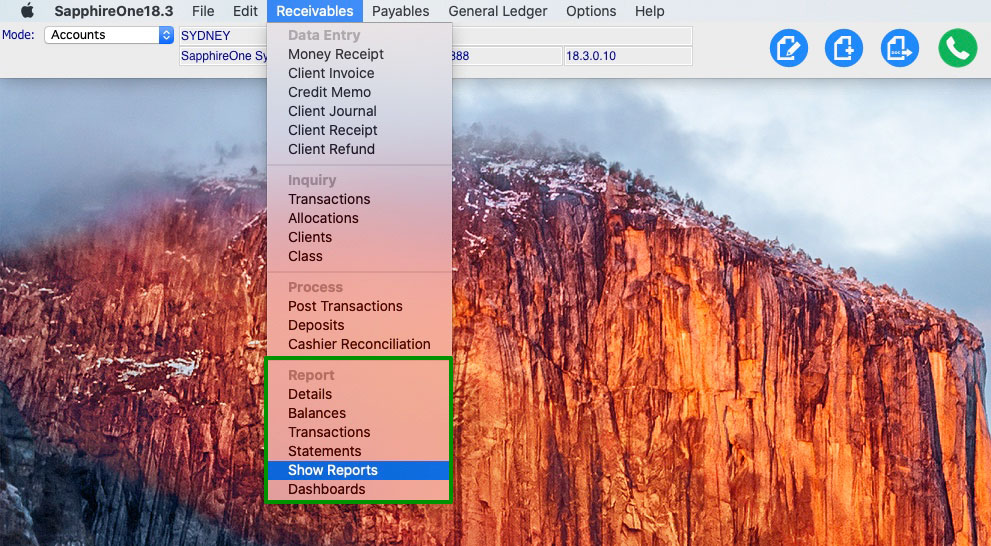
- Show Reports
- Dashboards
In our past tutorials we have looked at when and how to create the Accounts Receivables Client Details Report, the Balances Report, the Transactions Report and the Statements Report in more detail.
Read on for the next tutorial on the Accounts Receivables ‘Show Reports’ feature, a dynamic function which offers you a wide range of customisable report display options within SapphireOne.
A closer look at SapphireOne Accounts Receivables ‘Show Reports’ functionality.

The Accounts Receivables ‘Show Reports’ functionality gives you the ability to report dynamically within the SapphireOne interface.
Rather than creating a PDF report or printing a hard copy as we have seen in the other four Accounts Receivables reporting options – Details, Balances, Transactions, Statements – the Show Reports function allows you to pick your criteria and create an interactive report in real-time on your screen.

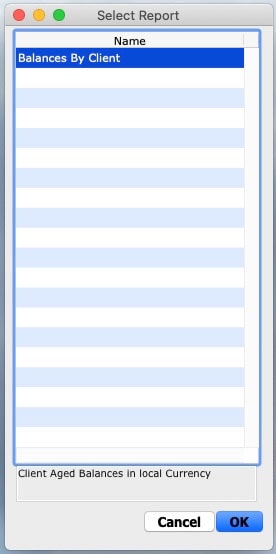
The Show Reports option presents the above pop-up, giving you the ability to create a pre-set ‘Balances by Client’ report. This report allows you to view your outstanding balances by client and report on the total amount of aged debtors in your data file.

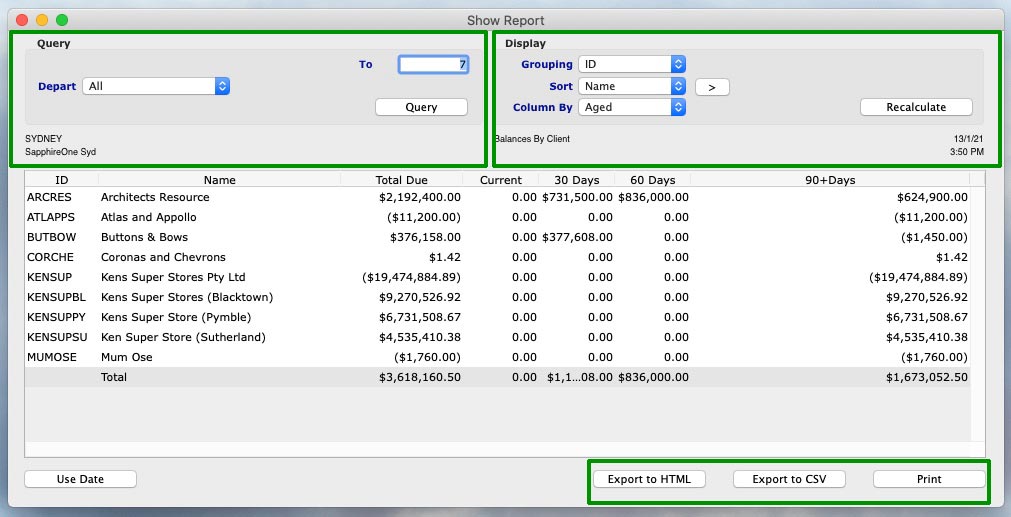
You can choose how you would like to organise your report by selecting your preferences in the dropdown ‘Query’ and ‘Display’ fields at the top of the reporting window.
Show Reports – Query Dropdown
A feature of Show Reports is that queries may be performed using convenient drop-down menus as well as a dedicated query button allowing the user to search for virtually anything that is in the data file.
The ‘Depart’ drop-down menu gives you the ability to choose from ‘All’ departments to individual ones.
Show Reports – Display Dropdown
- The Display options for the report are also selectable using drop down menus.
- By selecting ‘Grouping’, you can select how you would like your clients to be displayed in the report – by ID, Class, Department, Area, State, Customisable Tags, or by Quotes.
- There is also an option to ‘Sort’ the list ascending or descending by selecting the > button just to the right of the data entry field. The direction of the > on the button will indicate the sort order.
- The ‘Column’ can also be sorted by ‘Aged’ debtors or the individual client ‘Terms’.
- Upon entry the ‘Recalculate’ button must be selected so that the system will do an initial calculation for the default settings in the report. When any changes are made it must also be selected so the system can re-calculate the report using the new selections as made by the user.
Show Reports – Export and Print
Once the report is on screen the user may print the report, or export the data in either HTML or CSV formats for direct viewing using a browser or excel spreadsheet type program.
Any Questions?
For more information on Accounts Receivables Reports, or to find out how you can get the most out of your SapphireOne application, please contact us or book a call with a member of our Support Team. We are always here to help!
Tags : -


